

We are getting ready to release the new Pokit app to everyone, so we thought it would only be right to post a ‘how to’ blog for the new app. There is also the accompanying video we have released with our wonderful model, Lachlan who is part of the Pokit Innovations team (Check it out here). You will be seeing more of us in the near future, don’t you worry.
Connecting your Pokit Meter to the app
Pairing your Pokit Meter
To begin, your Pokit Meter connects via Bluetooth. Make sure the battery insulation tab has been removed from the Pokit Meter and make sure Bluetooth is enabled on your smart device.
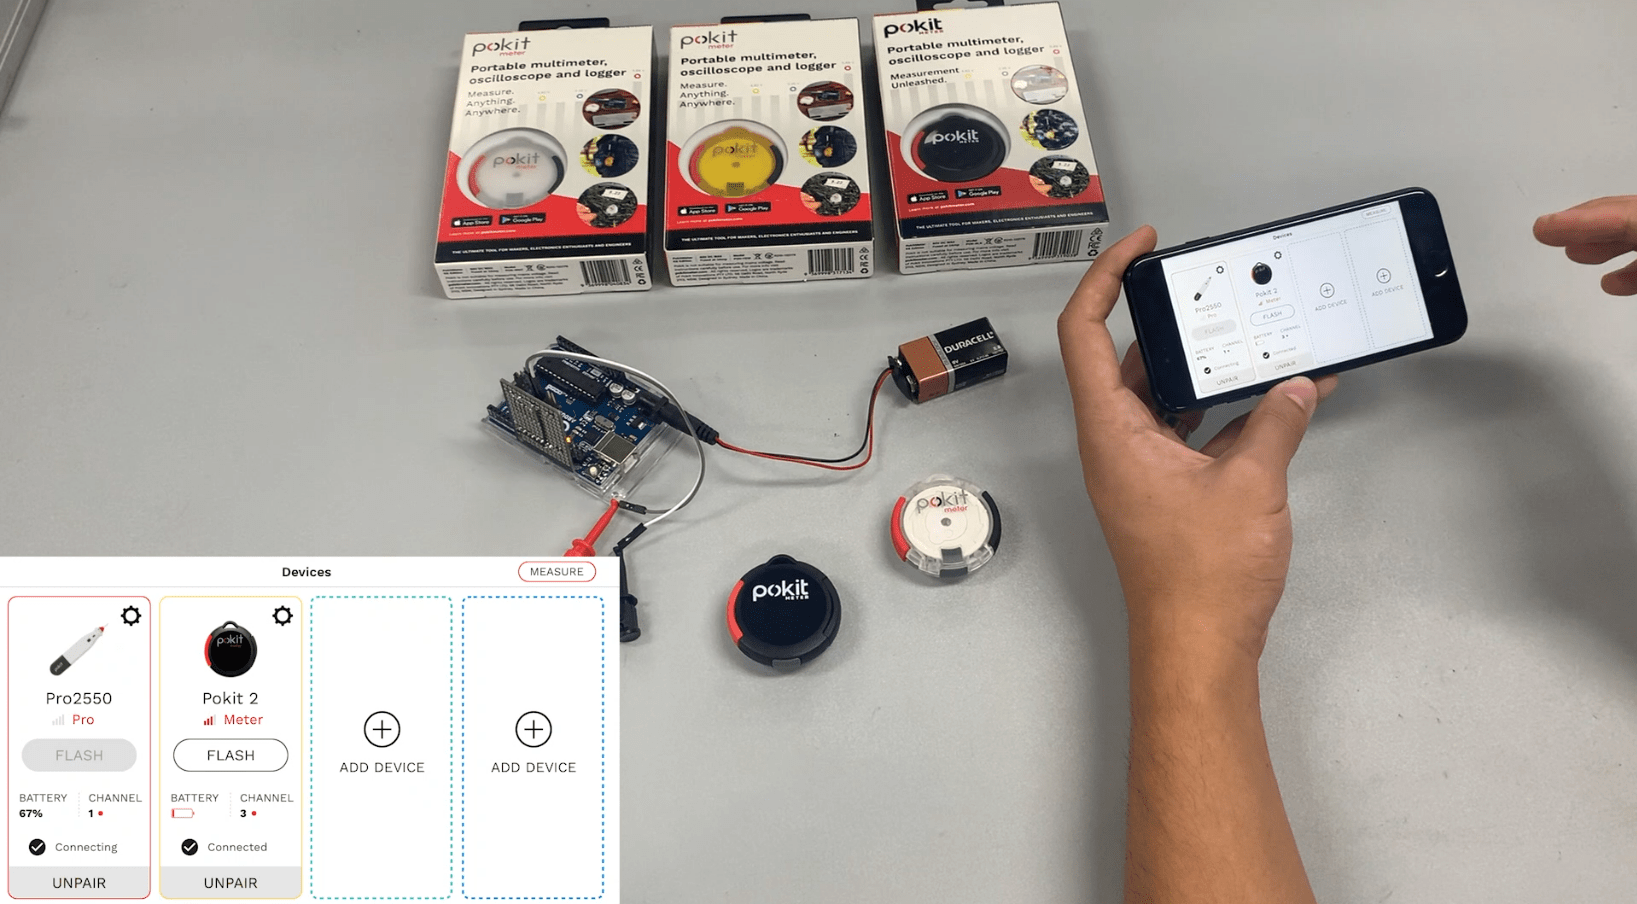
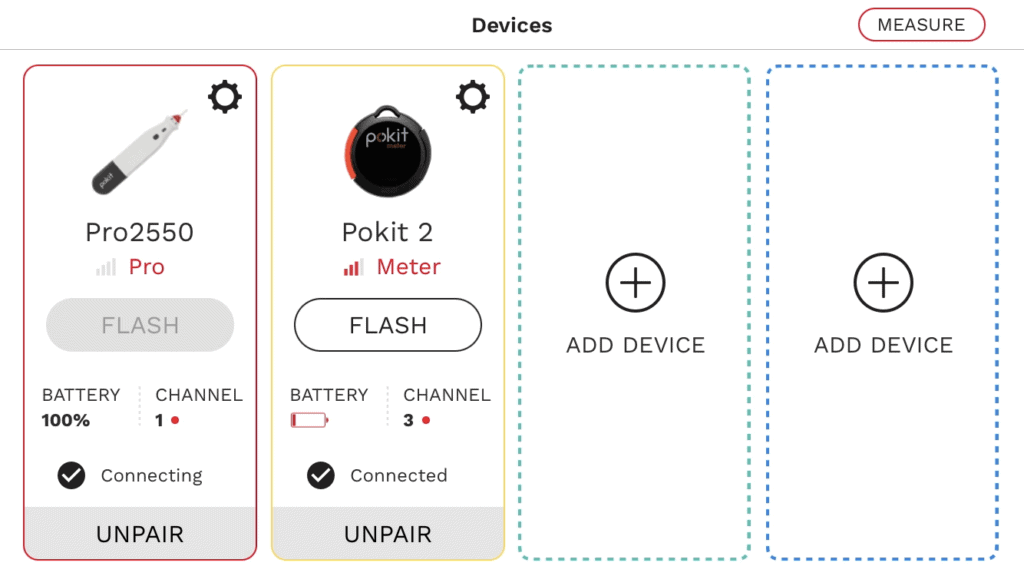
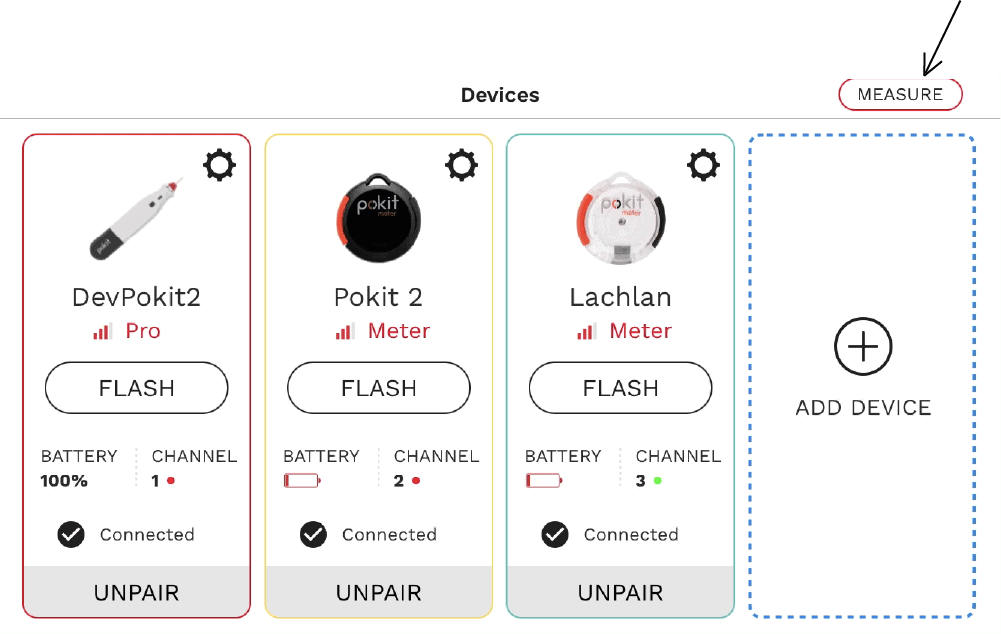
When you start the Pokit app you will be faced with 4 channel slots. You are able to have up to 4 devices paired at one time.
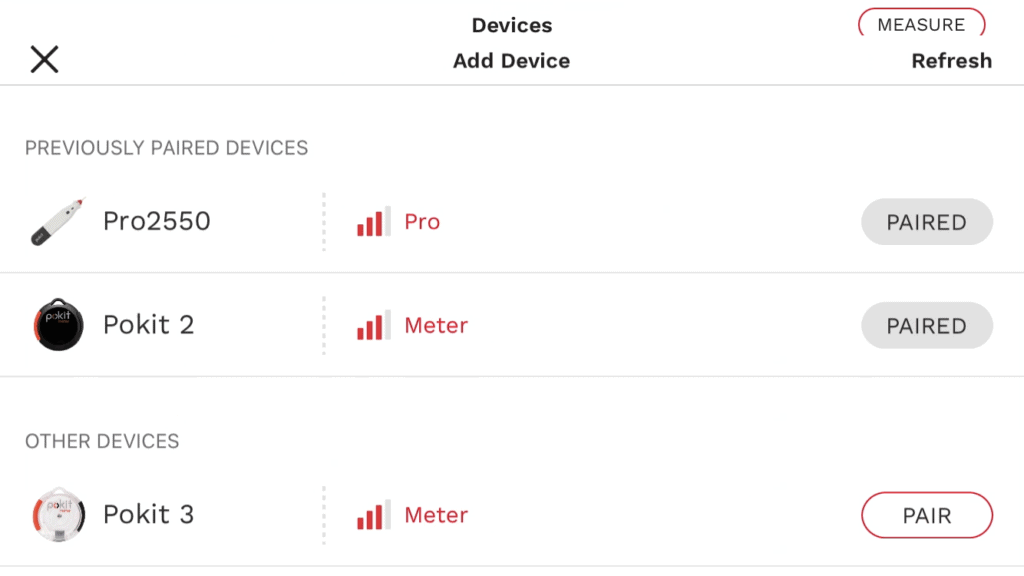
Click ‘add device’ and select your Pokit Meter. In the screenshot below you can see if you have paired your device before or other devices. This should be your first time pairing so head to ‘other devices’ and you should see your device here. Click ‘pair’. This will take you to the page you started on.
Changing your device settings
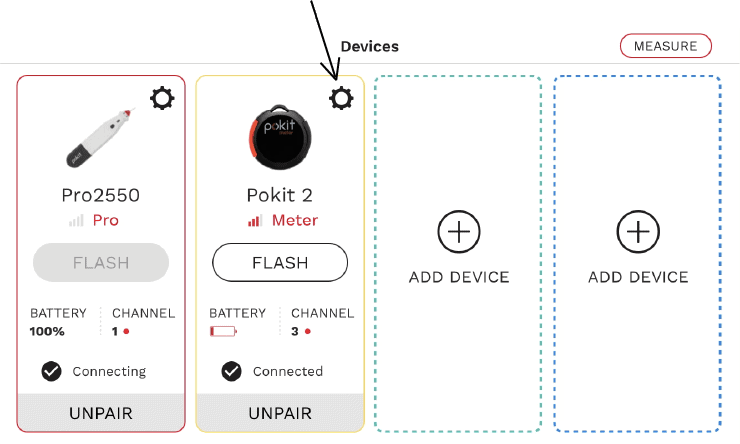
You are able to change a couple of settings to make your life a little easier when using the new Pokit app. Because of the new multichannel function we thought it would be best if you could change:
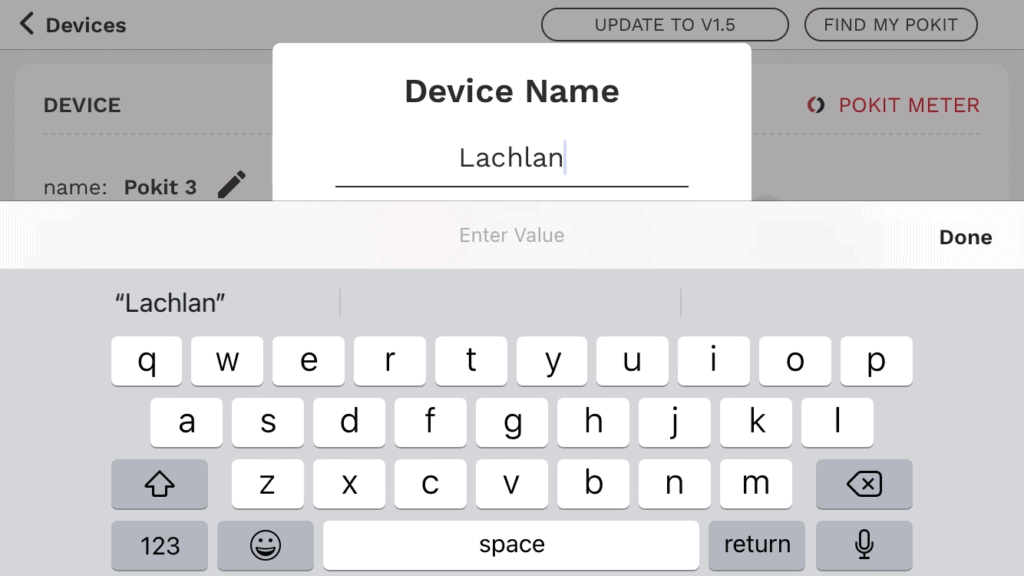
- The Name of your Pokit Meter
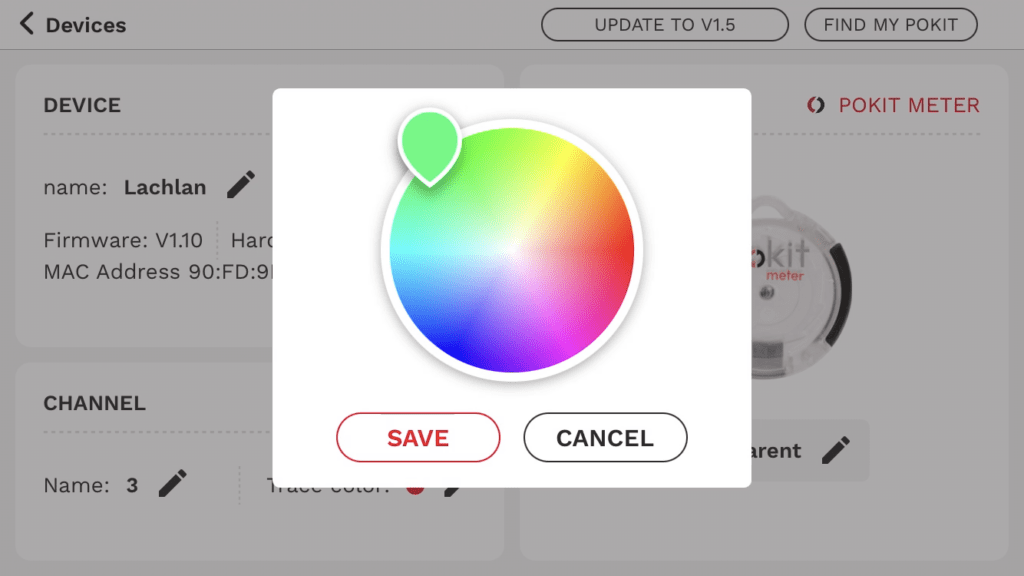
- The Colour and Name of the channel of your Pokit Meter
- The Corresponding Picture of your Pokit Meter
Each of these aspects can be changed using the pencil on the right side of each aspect.
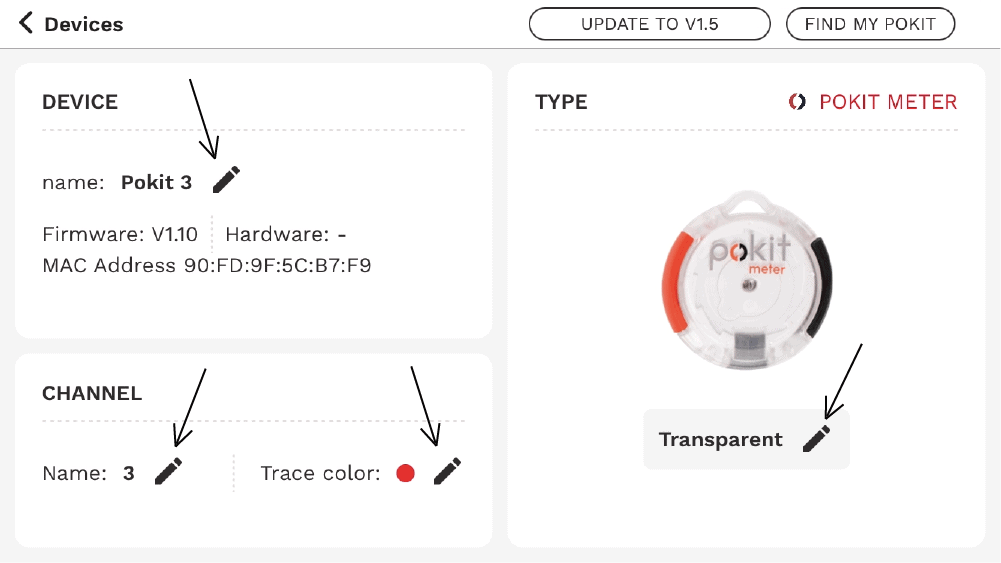
Find My Pokit
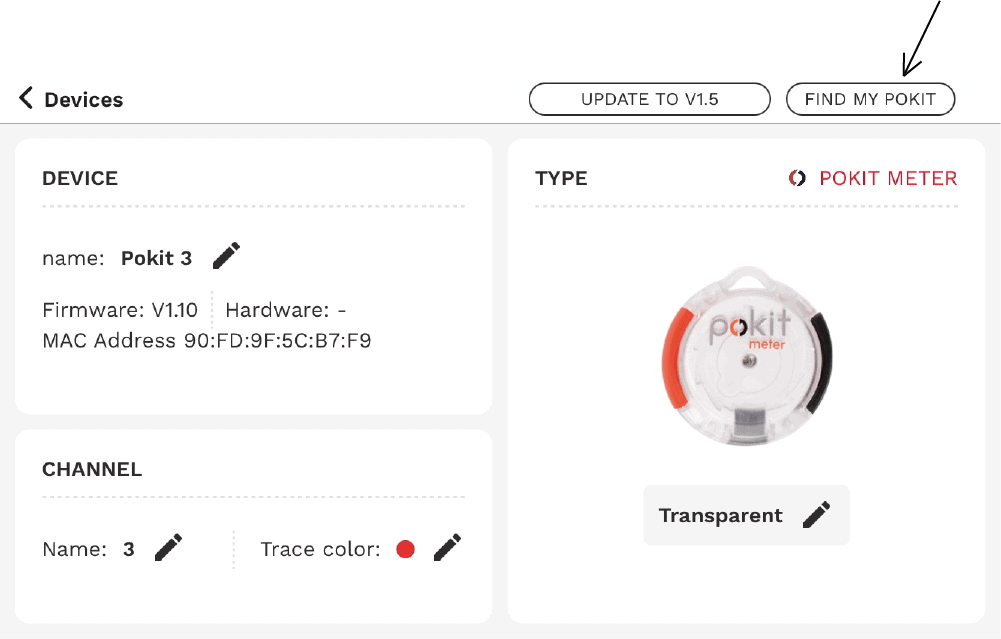
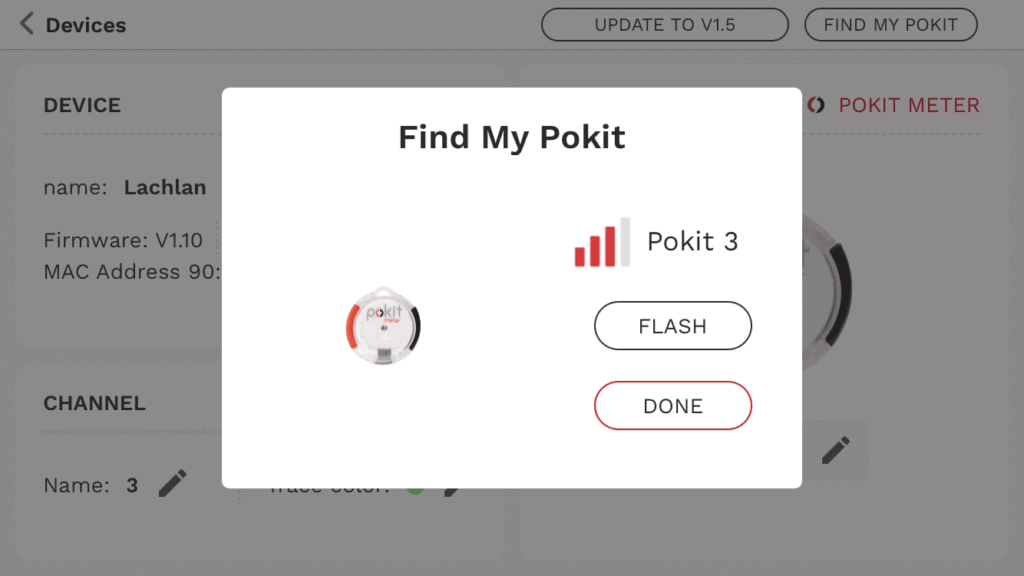
At the top right corner of your ‘device settings’ screen there is the button, ‘Find my Pokit’. Press this and you will be able to use two functions that will help when you have misplaced your Pokit Meter or have multiple Pokit Meters. These are flash and Bluetooth strength bar.
Flash
Under the name of your device there is the ‘flash’ button. Press this and the light in the middle of your Pokit Meter will flash, making it distinguishable.
Bluetooth strength bar
Beside the name of your device there are 4 bars, these correspond to how close or far your device is from your smartphone.
Using the Multimeter
To begin, you will be on the device starting page. In the top right corner you will see a ‘Measure’ button. Click this and a side bar will appear. We’re going to start off with the multimeter. So, go ahead and click this.
Multichannels
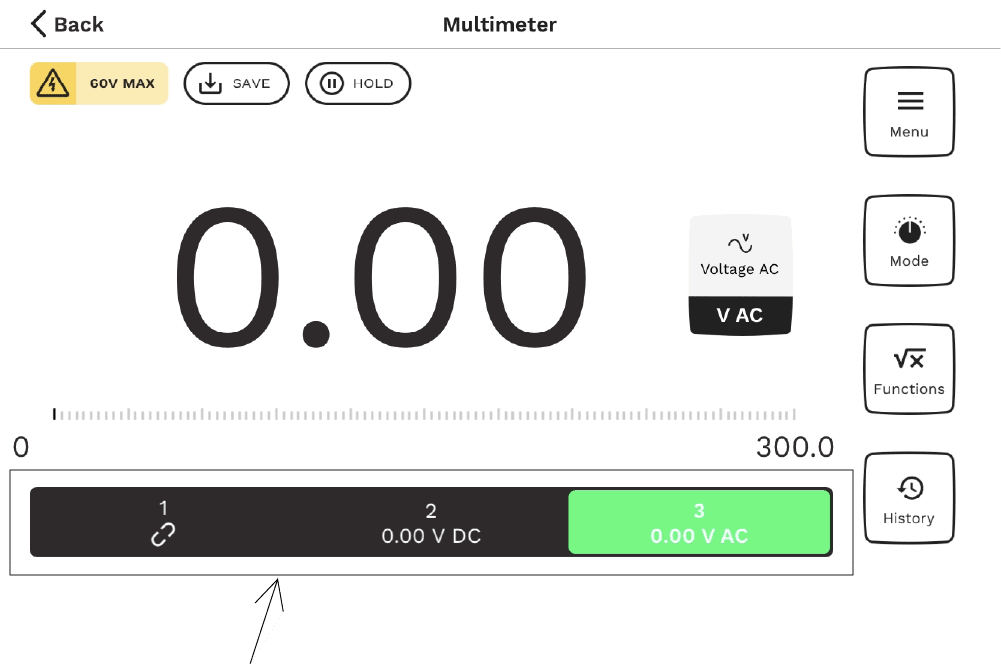
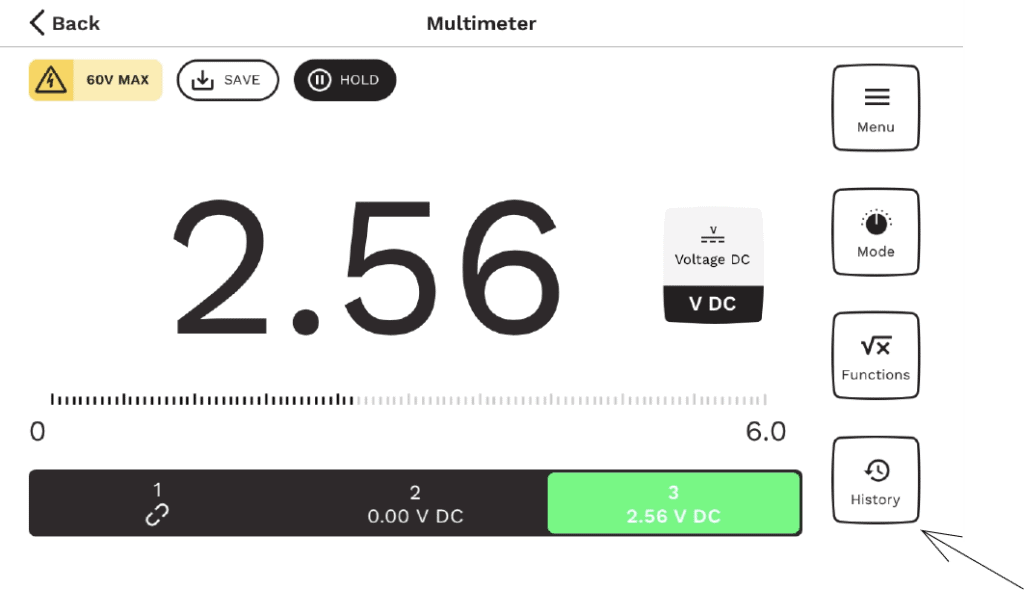
At the bottom of your screen, there are your multiple channels that correspond to the channel names and colours we changed earlier. You are able to switch between your channels whilst using the app. Whilst switching channels, you can see that the values of each channel are displayed on each tab. This is to ensure you know each device is still working and reading.
Multimeter Modes
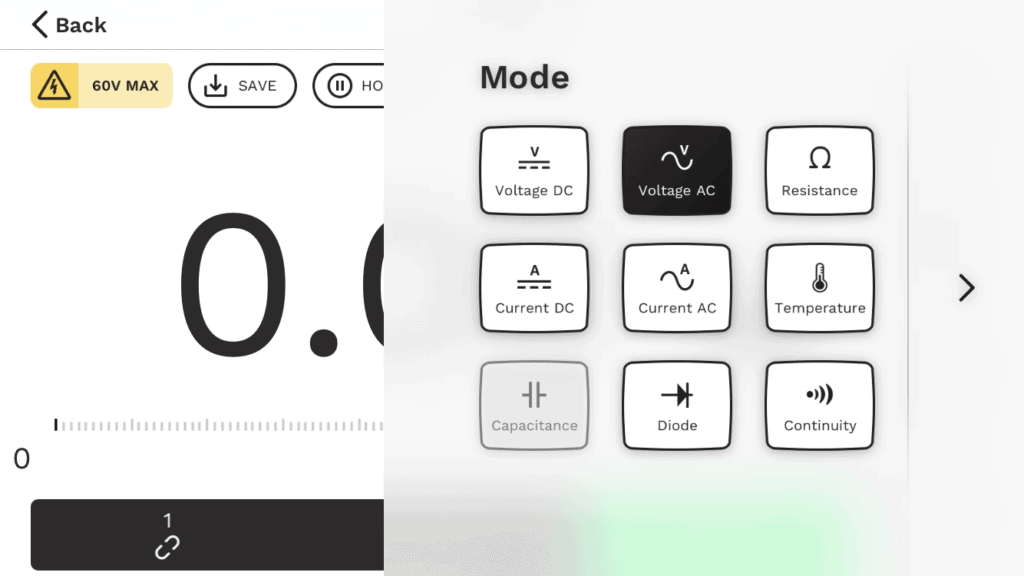
On the right hand side of the screen there are 4 buttons, ‘Menu’, ‘Mode’, ‘Functions’ and ‘History’. Click on ‘Mode’ and a side bar will appear and display 9 modes you are able to use. These are:
- Voltage DC
- Voltage AC
- Resistance
- Current DC
- Current AC
- Temperature
- Capacitance (This is only available on the Pokit Pro)
- Diode
- Continuity
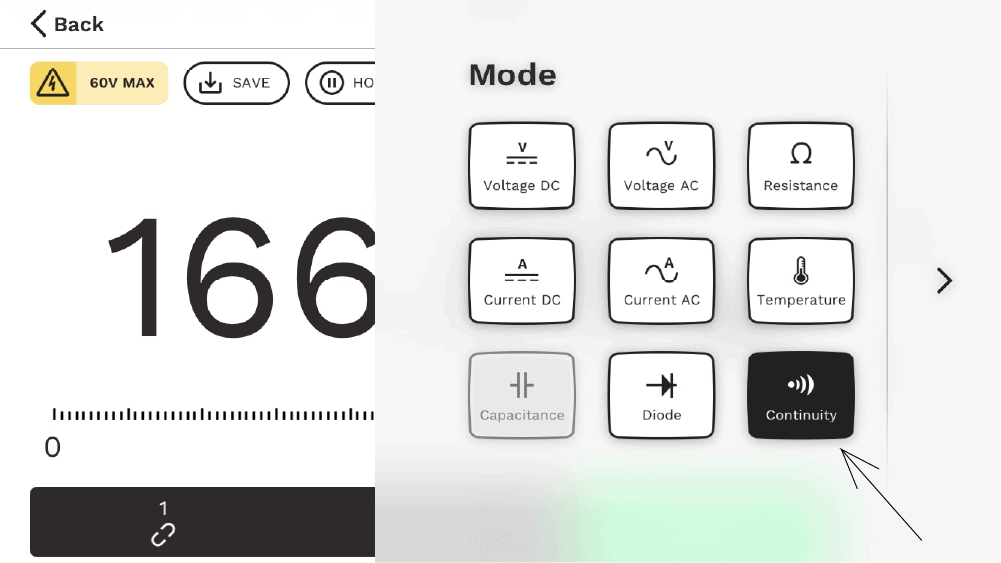
Checking for Continuity
To ensure your Pokit Meter is working properly, you should always begin with a continuity check. To do so, press ‘mode’ then select ‘continuity’. Then the easiest way to do the check is to pull the leads of your Pokit Meter and touch them together. This will cause your app to beep (Make sure your sound is up!).
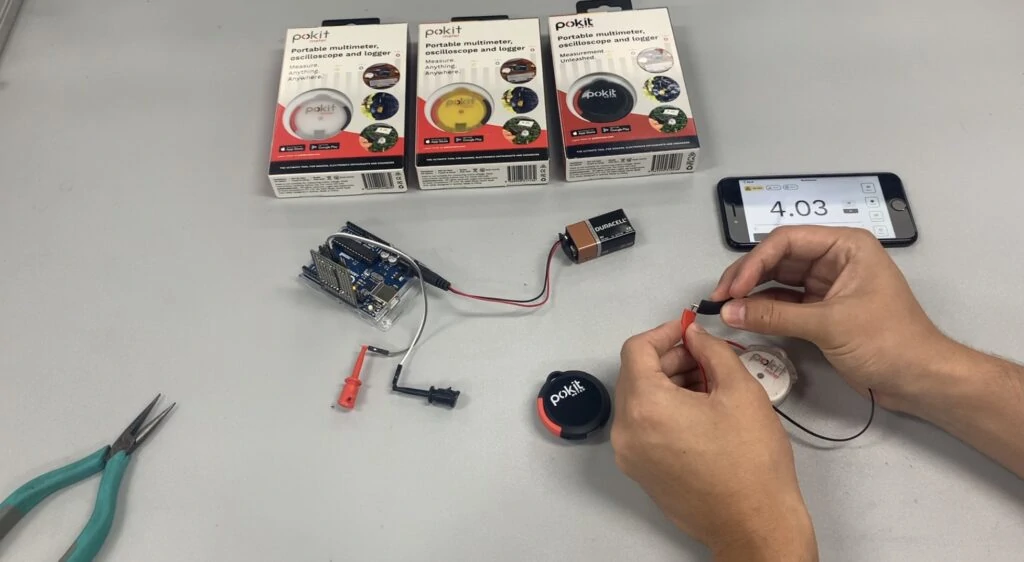
Testing with your Pokit App
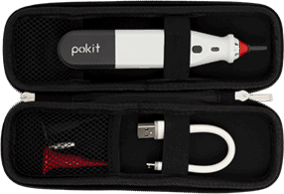
For our demonstration we are using an arduino we have set up to generate signals. In your Pokit Meter kit, you have received wire grips you can use to take readings. So, whatever you are testing you can use these to connect the Pokit Meter.
Using the Multimeter Modes
As we mentioned earlier, there are several that you will be able to use. For this demo, we will be using the Voltage DC mode, but you can use whichever mode you would like to. So, select the mode you would like to use and this will take you to the main display screen.
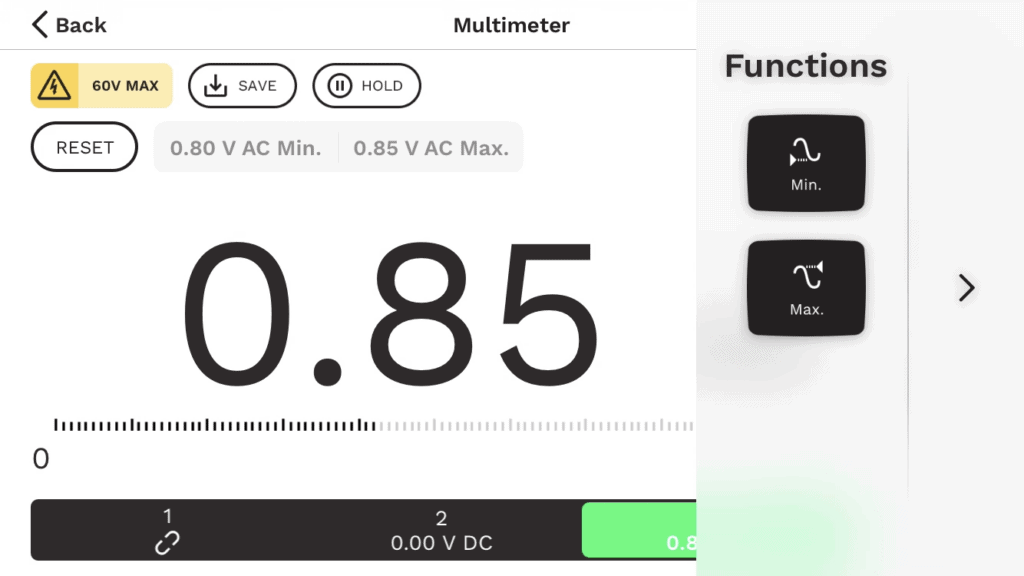
Using the Multimeter Functions
There are two functions you are able to use on the new multimeter page. These are the minimum and maximum value that has been read on the Pokit Meter. You can do this by pressing the ‘Function’ button on the right of the screen. Pressing this will display the sidebar of ‘min’ & max’ values. These values will then display on the top of the main screen.
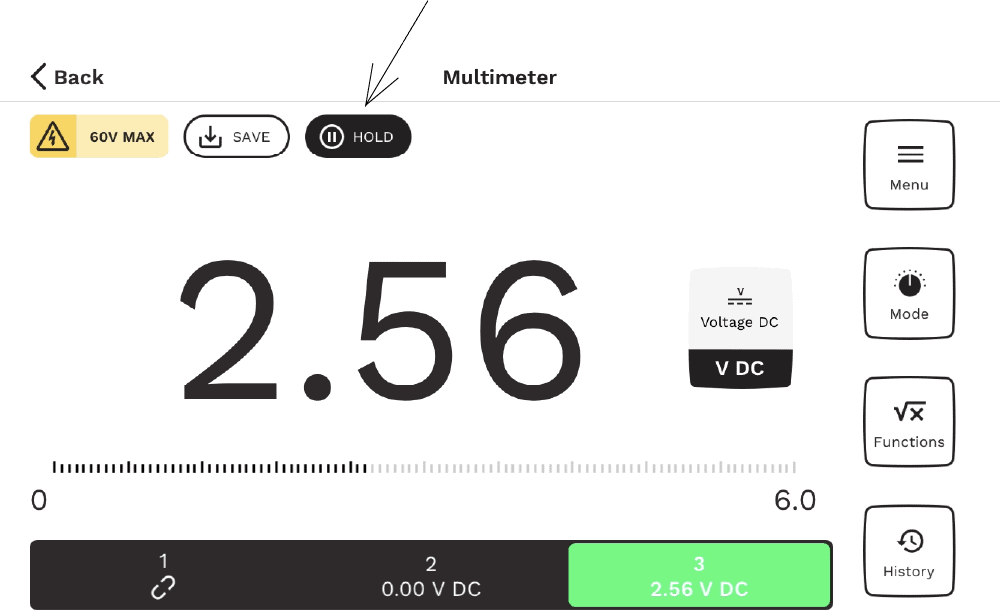
Holding Values
When you find the value you are looking for you can use the ‘hold’ button to lock the current value on the screen. Tap the button again to release the hold.
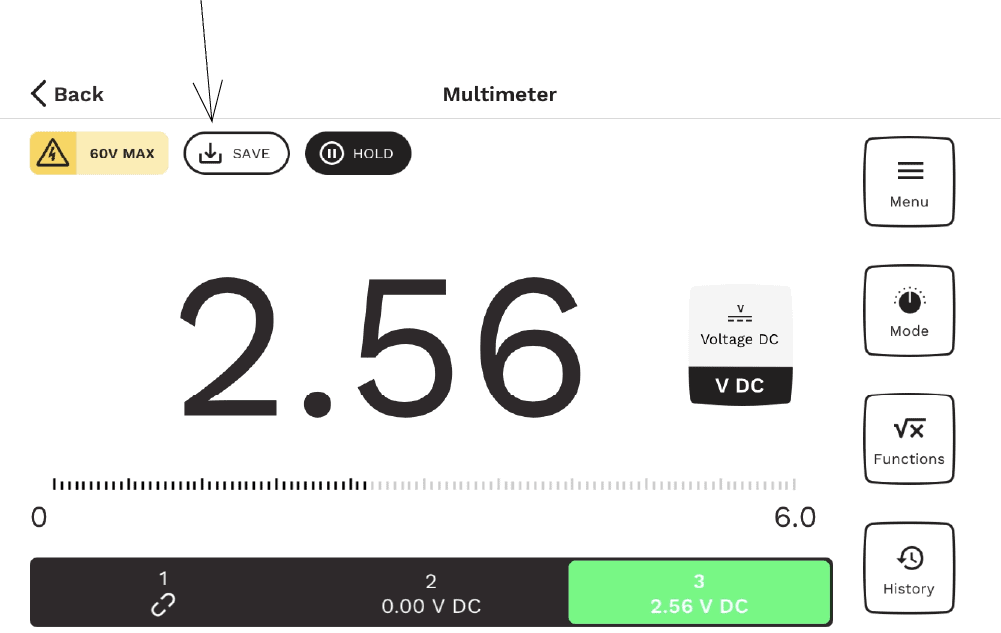
Saving Values
You are able to save values at any time for future use. The ‘Save’ button is the 2nd button at the top. Pressing this will allow you to save the value and it will then be displayed in ‘History’. To find your saved values, press the history button in the right hand corner of the screen.
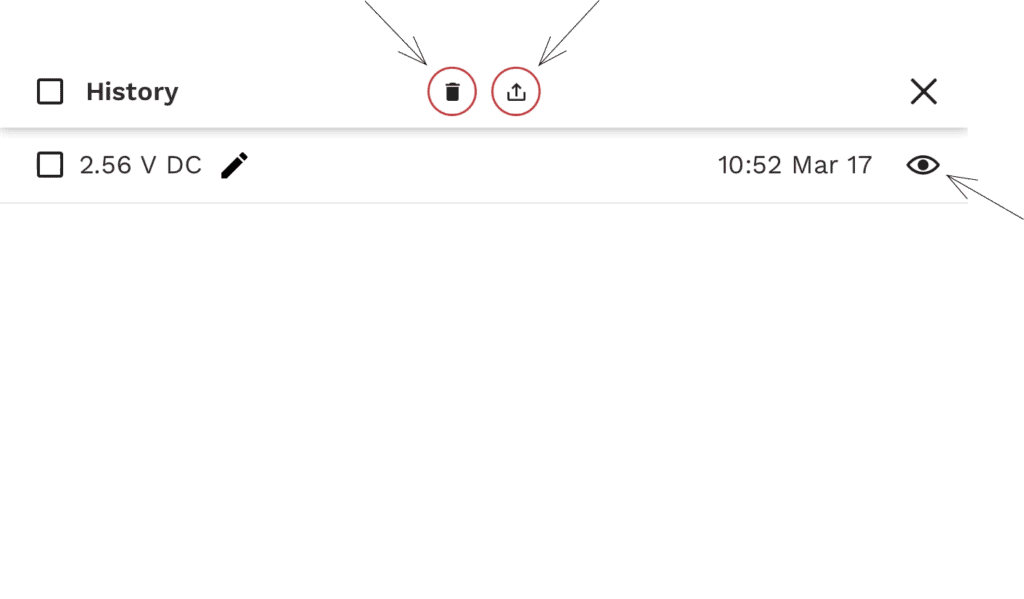
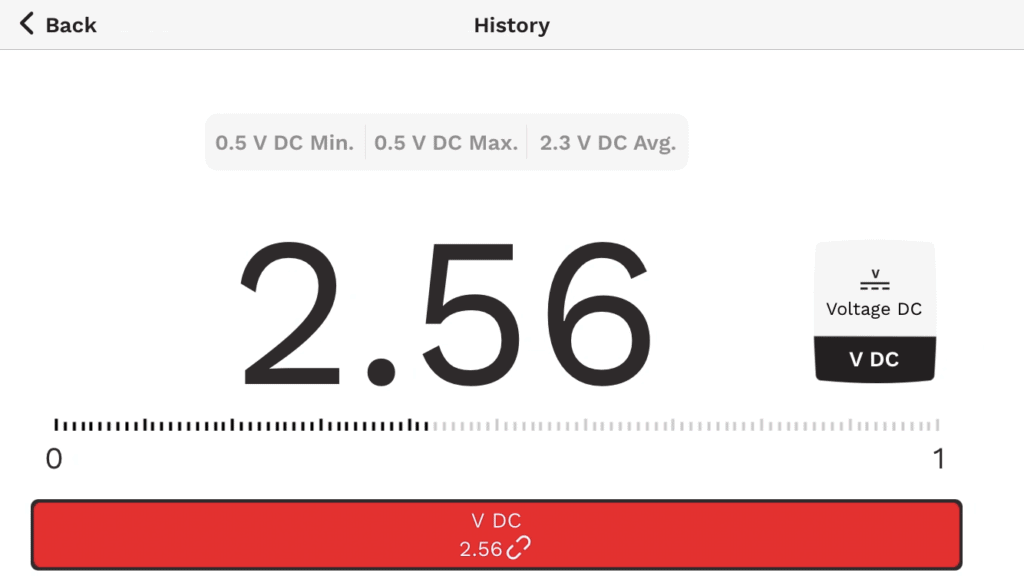
Your History
Once in ‘History’, you are able to see all your saved measurements. On each of these, you can press the ‘eye’ icon and it will display it on the screen. You can also export these measurements using the ‘share’ icon at the top by selecting them on the left hand side. You are also able to delete unwanted history items.
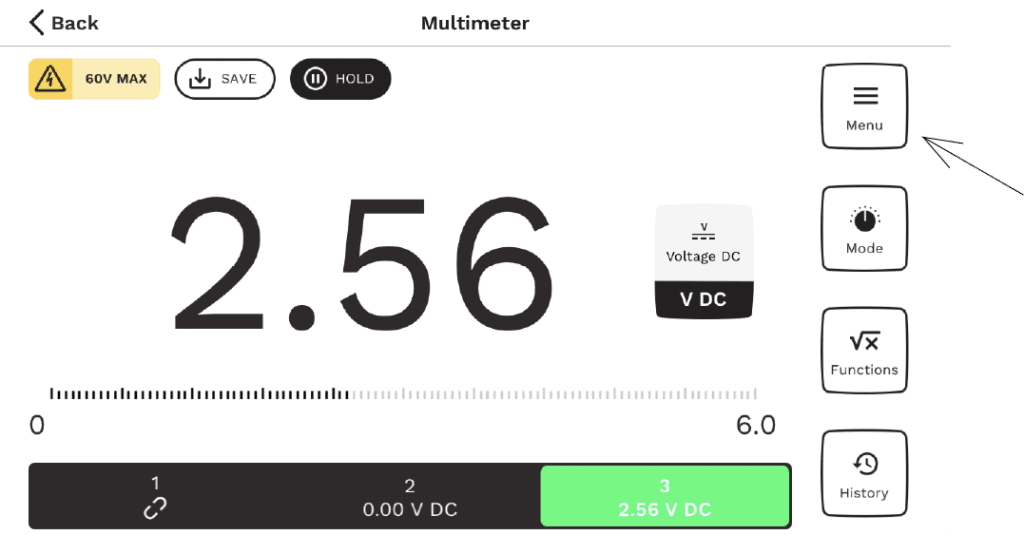
Using the Oscilloscope
To begin using the oscilloscope click the ‘Menu’ button in the top right. A side bar will appear. We’re going to be using the oscilloscope. So, go ahead and click this.
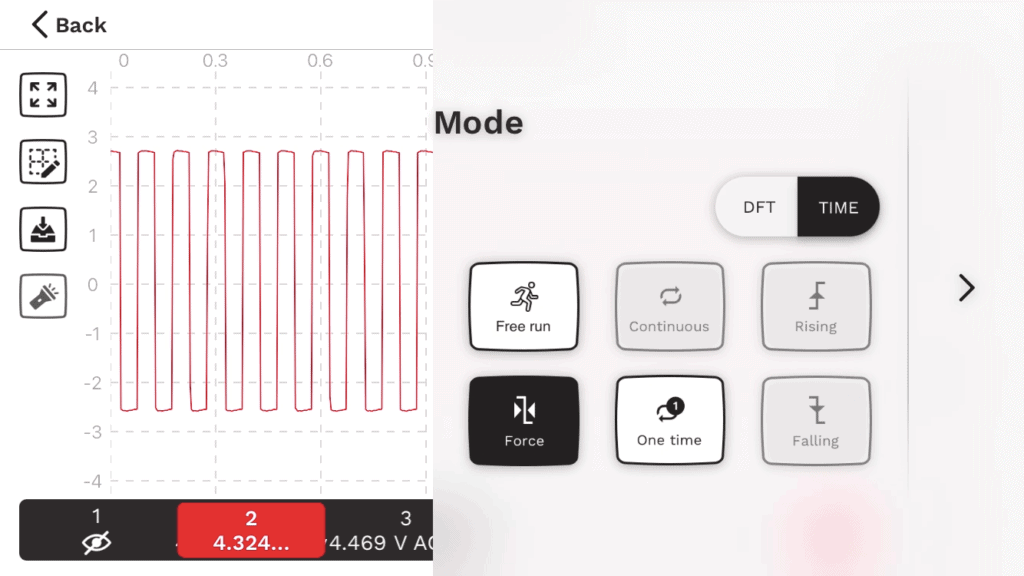
Oscilloscope Modes
As mentioned earlier, on the right hand side of the screen there are 4 buttons, ‘Menu’, ‘Mode’, ‘Functions’ and ‘History’. Click on ‘Mode’ and a side bar will appear and display 6 modes you will be able to use. These are:
- Freerun (This is only available on the Pokit Pro)
- Force
- One time
- Continuous (This is only available on the Pokit Pro)
- Rising (This is only available on the Pokit Pro)
- Falling (This is only available on the Pokit Pro)
Select whichever you would like to use. For our demonstration we used ‘Force’. Once you have selected a mode, ensure you have selected how you would like to have the reading displayed in DFT or time. This can be found above the 6 modes.
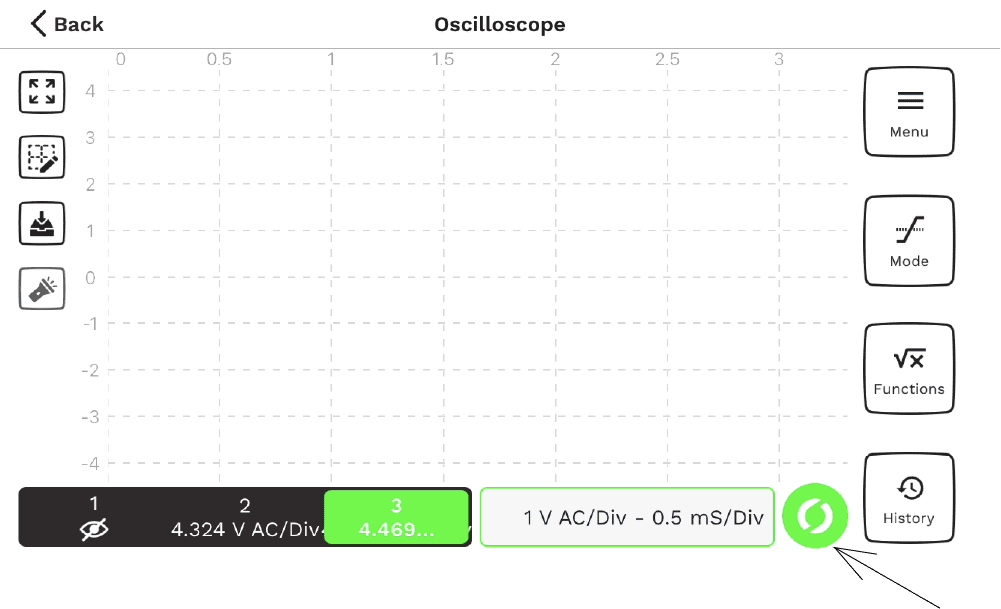
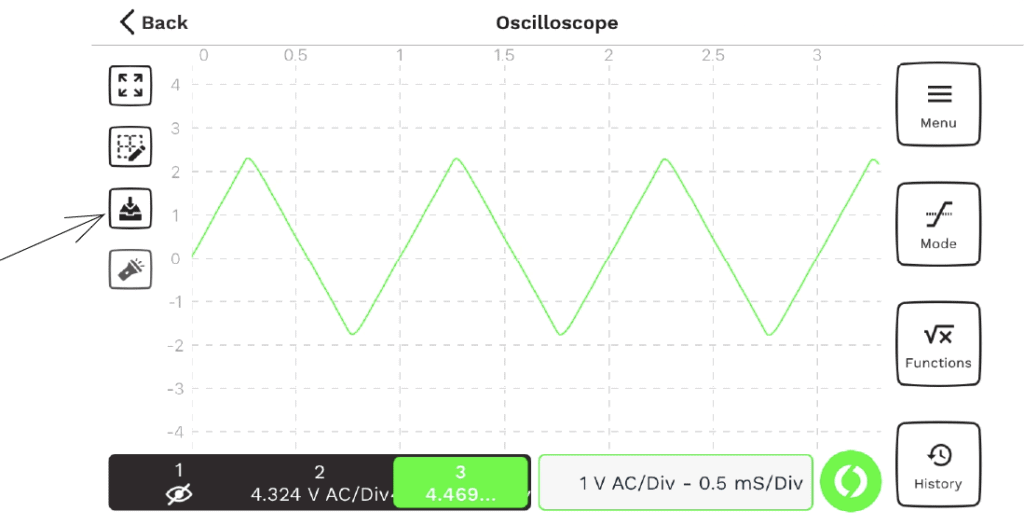
Begin Reading on the Oscilloscope
Once you have selected a mode and either DFT or Time, you can start taking readings using your Pokit Meter. To do so in the bottom right corner of your screen there is a button with the Pokit logo (The colour of the logo will be dependent on the colour of the channel). Press this and you can begin your reading.
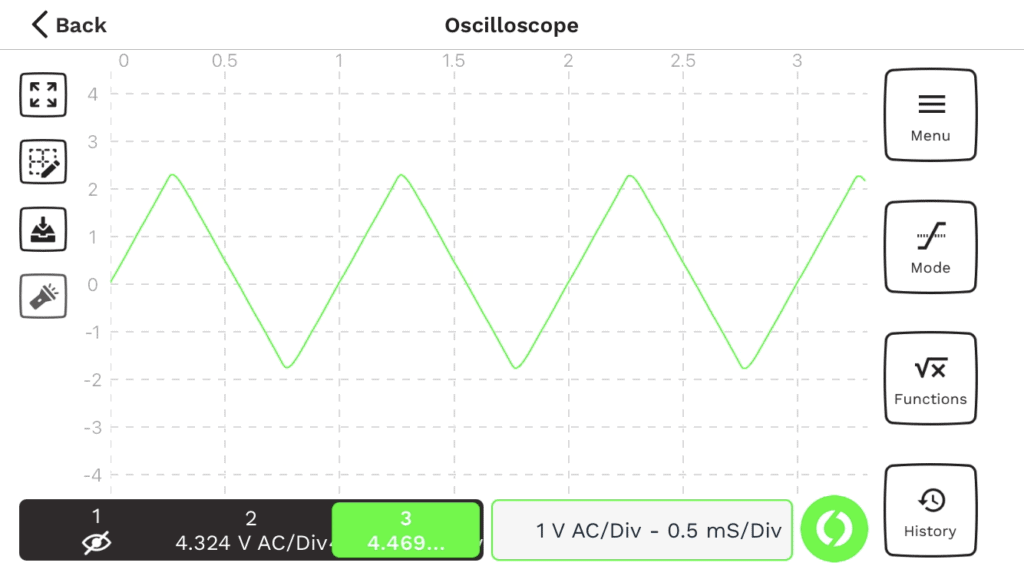
Once you have taken a reading, the wave may have been clipped off from the top or bottom. To be able to see the entire wave you can pinch and drag on the screen to allow the entire wave to see shown.
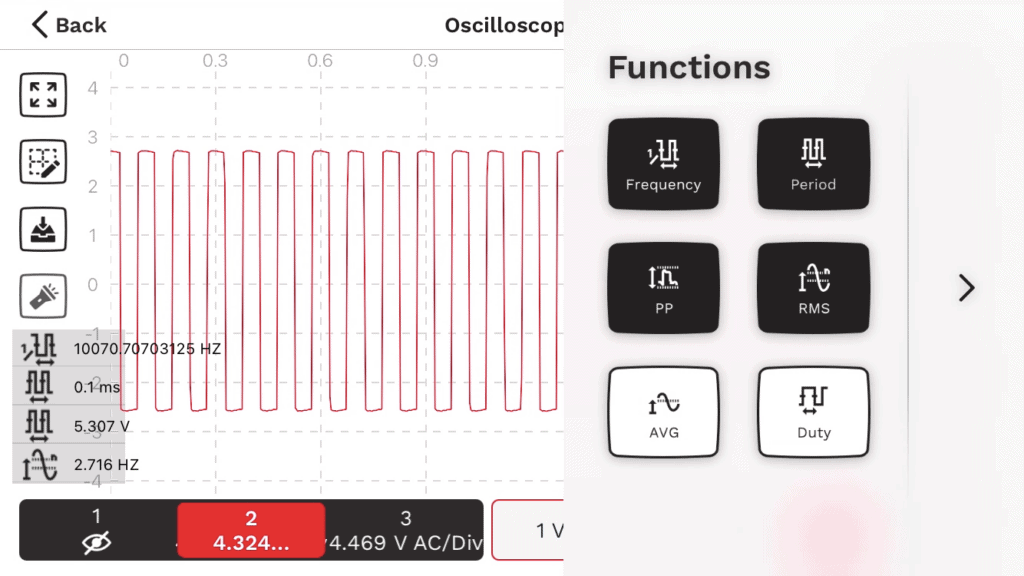
Using the Oscilloscope Functions
There are 6 functions you are able to use on the Oscilloscope. These are:
- Frequency
- Period
- PP (Period to Period)
- RMS
- AVG
- Duty
You can only have 4 of these functions calculated at any one time. You can do this by pressing the ‘Function’ button on the right of the screen. When you have selected the functions you would like to use they will be displayed on the main screen to the left.
Saving Readings on the Oscilloscope
Similar to the Multimeter, you are able to save any readings you need. To do this there is a on the left hand side of the screen under ‘Back’, it is the 3rd below this. Pressing the ‘save’ icon you will be able to find this in the history of your Pokit App (see multimeter ‘Your History’)
Using the Logger
Using the logger is similar to using the Oscilloscope but has some small differences we will go over now.
To begin using the oscilloscope click the ‘Menu’ button in the top right. A side bar will appear. We’re going to be using the Logger. So, go ahead and click this.
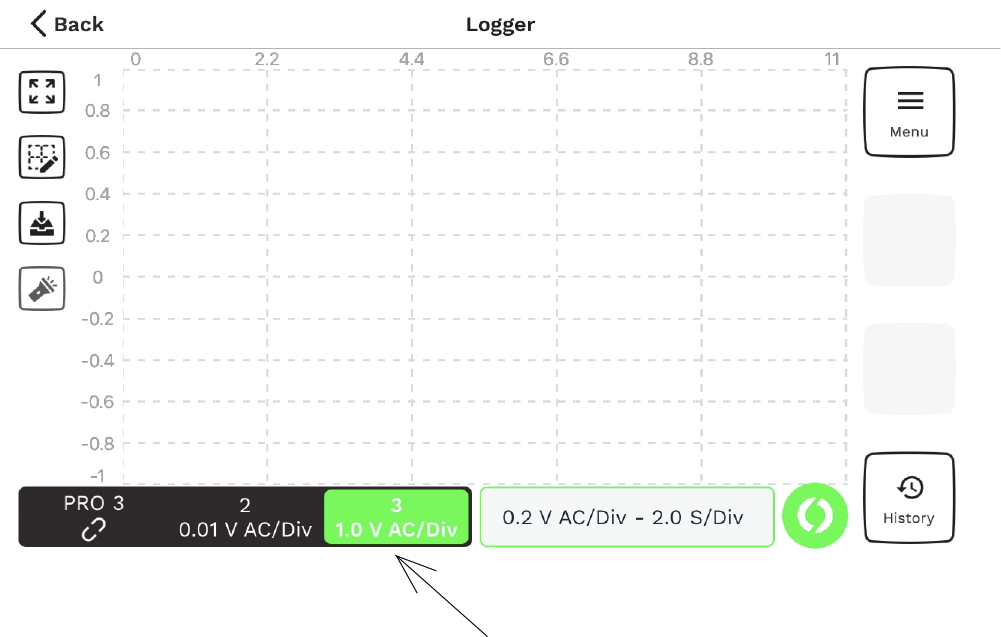
Before Reading on the Logger
First switch to the channel of the Pokit you would like to log. This can be done at the bottom of the screen in the multichannel tabs.
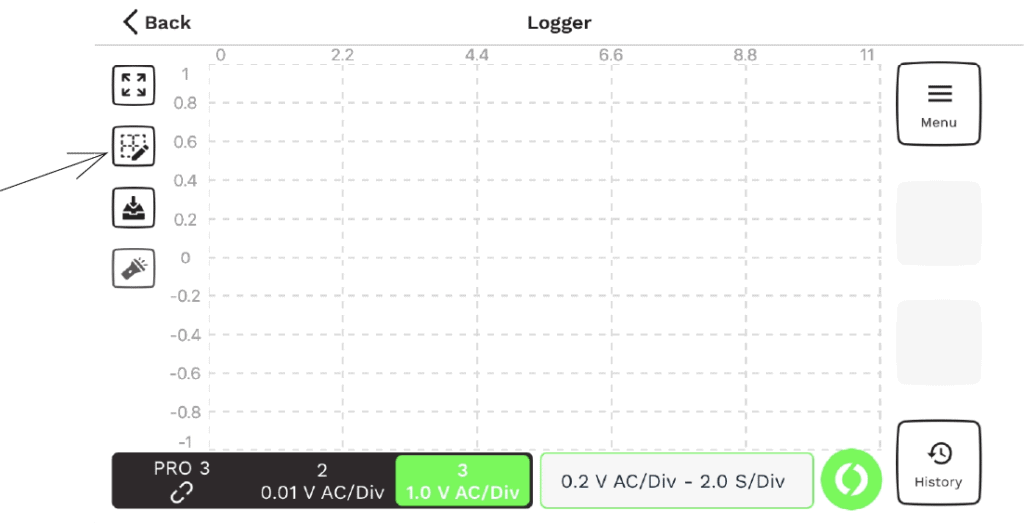
Changing your parameters
Once you have switched to the Pokit Meter you would like to log, switch the parameters you would like to see whilst logging. To do this click the 2nd button on the left hand side of the screen. You are able to change:
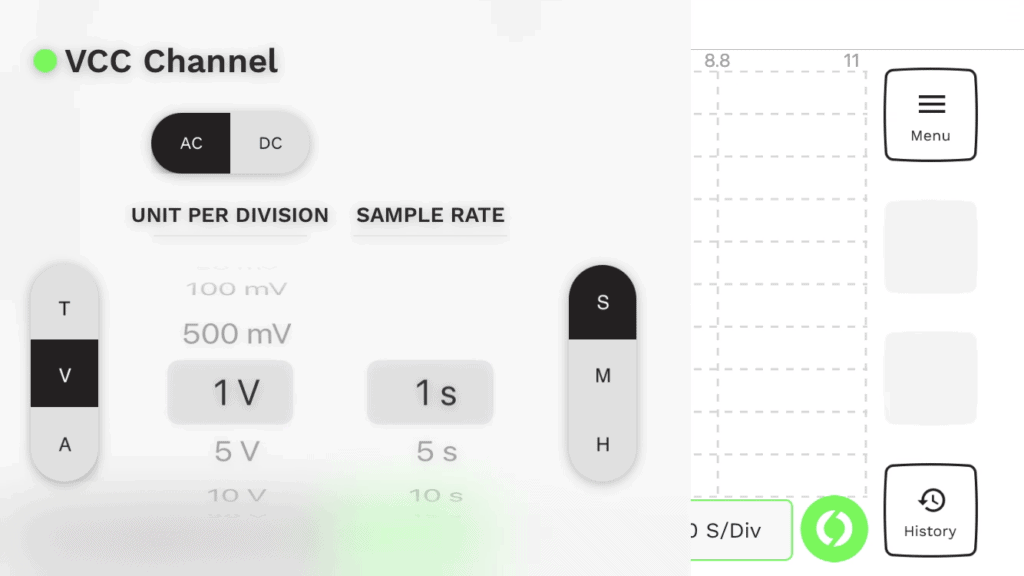
- AC, DV or Temperature
- Voltage, Current or Temperature
- Unit Per Division
- Sample Rate
Once you have chosen these, press outside of the sidebar and go back to the main display screen.
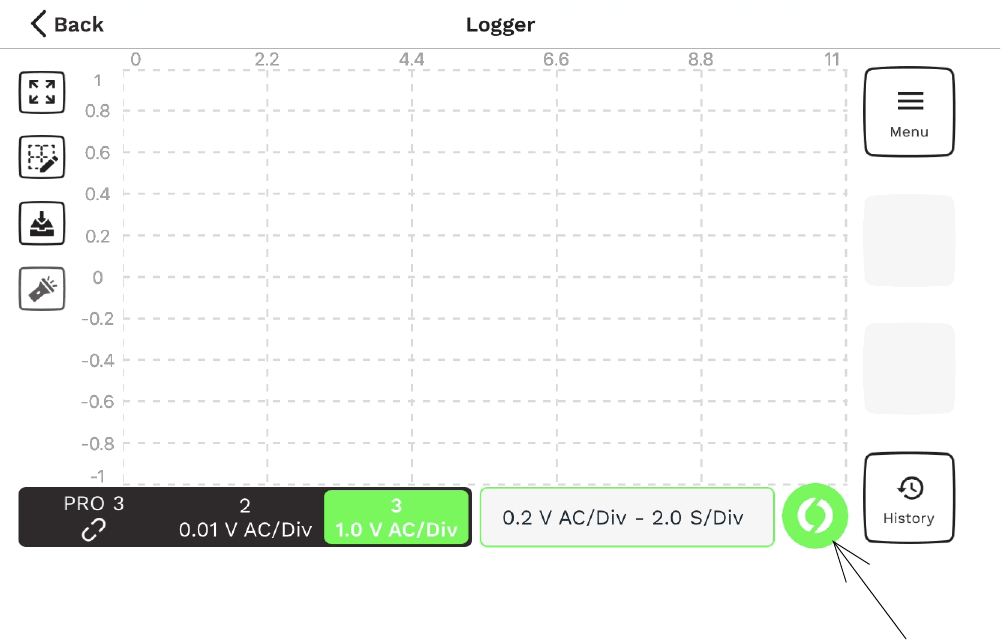
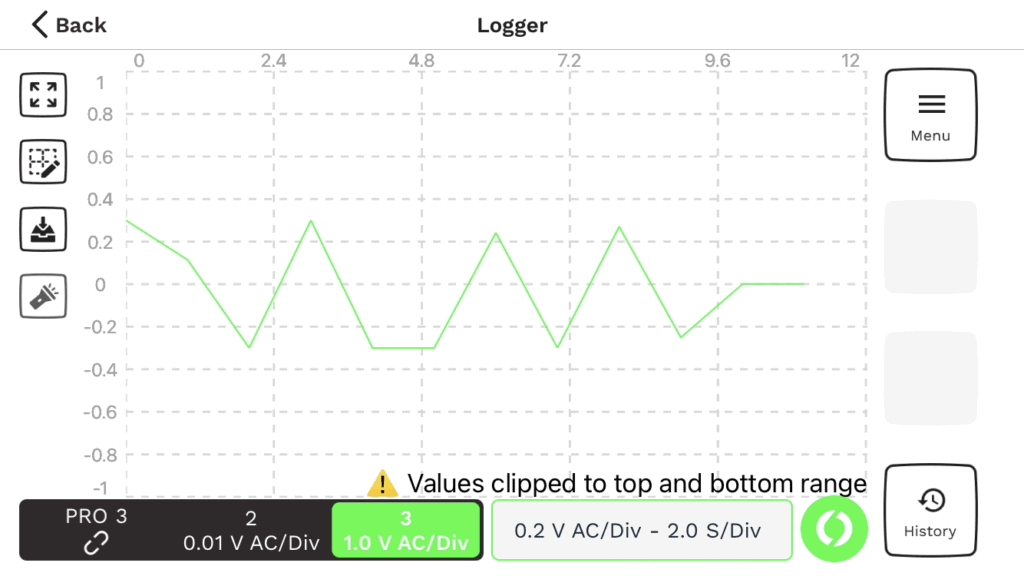
Reading on the Logger
Once you have selected parameters, you can start logging using your chosen Pokit Meter. To do so in the bottom right corner of your screen there is a button with the Pokit logo (The colour of the logo will be dependent on the colour of the channel). Press this and you can begin your reading. You can have this running however long you need to.
Saving on the Logger
This is the same as the oscilloscope, see ‘Saving Readings on the Oscilloscope’
Well, that’s the end of our ‘How to’ for the new Pokit app. I hope this helps you whilst you’re using your Pokit Meter and the new app. As I said in the start, there is so much more to come from us here at Pokit Innovations, so be sure to stay up to date with us through our socials. If you have anything you would like to see from us, let us know by heading over to our Forum or Facebook.
Bye for now!
Kaylen at Pokit Innovations